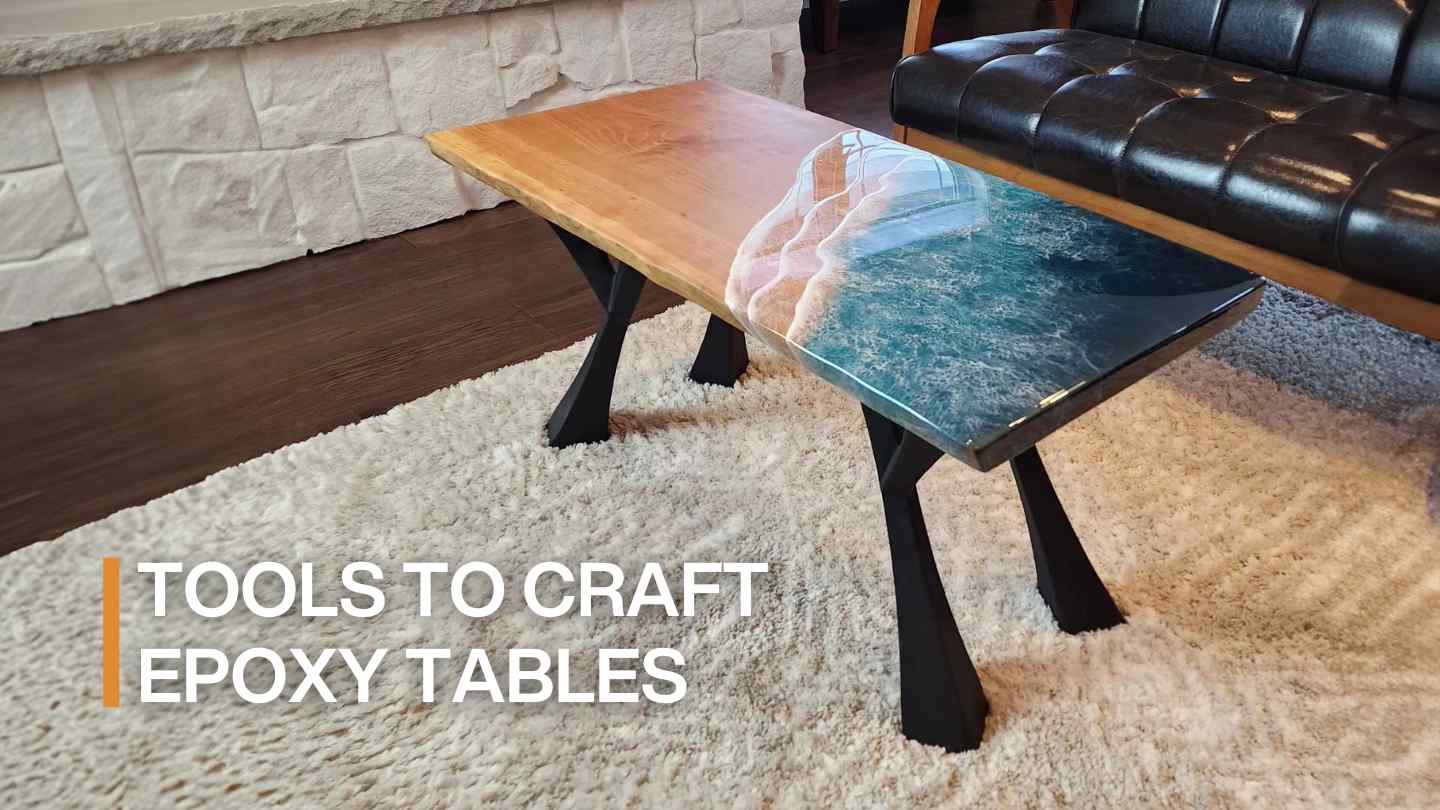
Epoxy tables, with their captivating designs and glossy finish, are more than just furniture - they're conversation starters. These stunning pieces effortlessly become the focal point of any room, be it a home or an office. Imagine crafting a table that's not just unique, but is a reflection of your style and creativity. With epoxy and a palette of vibrant pigments at your disposal, you can create an array of tables, each with its own charm and character. The possibilities are as limitless as your imagination. Let's delve into the world of epoxy table making, with standard table dimensions, and explore the essential tools needed to make epoxy table.

1. Epoxy Resin and Hardener
The heart of any epoxy table is the epoxy resin itself. This clear, thick liquid, when mixed with a hardener, cures into a solid, glass-like finish that is both beautiful and durable. If you want to make a big and deep epoxy table, deep-pour epoxy resin will be the ideal choice.

2. Pigments and Accessories
Epoxy pigments play a critical role in the creation of epoxy and wood tables. They are responsible for the vibrant and dynamic colors you see in the ‘river’ part of the table. Mica powder pigments are commonly used for coloring epoxy resin. The colors that you choose also reflect your own style and personality.

3. Wooden Slabs
The foundation of your epoxy table is formed by wooden slabs. The wood type you select can significantly influence the final aesthetic of your table. Favorites among many include walnut, cherry, and maple, each offering its own unique charm. Opting for wood timbers with distinctive grain patterns and rich, dark hues can result in a striking contrast of color once the finishing coat is applied, thereby elevating the overall appeal of your table.

4. Mixing Containers and Stir Sticks
Essential tools for the preparation of your epoxy resin and hardener include mixing containers and stir sticks. Don't forget to achieve the correct ratio to ensure a successful cure. For a more efficient mixing process, consider using a drill with an attached mixer, which can significantly expedite the blending of your epoxy resin, hardener as well as pigments.

5. Measuring Tools
Precision is key in the creation of epoxy tables, and this is where measuring tools come into play. They are indispensable for accurately mixing the right proportions of resin and hardener, and for marking the wooden slab for precise cutting and shaping. An electronic scale is particularly crucial for measuring the epoxy mixture correctly.
To determine the required amount of epoxy, an ‘epoxy calculator’ available online can be a handy tool. Simply input the dimensions of the area where the epoxy will be poured, and the tools will swiftly provide you with the necessary quantity.

6. Power Tools
Power tools are indispensable in the realm of resin art. A table saw is essential for accurately cutting the wood, while a router is used to smooth out the edges. A drill comes in handy for creating holes. Preparing the wood surface before the application of epoxy is crucial, and this is where a sander plays a vital role. Remember to equip yourself with sanding pads of various grits. This will ensure a smooth and complete surface once the epoxy has cured.

7. Applicator Gun and Silicone Sealant
Before pouring the epoxy, silicone sealant is used to ensure that there are no gaps around the mold. This prevents the epoxy from leaking out during the curing process.

8. Protective Gear
Safety is paramount when working with epoxy and power tools for epoxy resin. Protective gear such as gloves, safety glasses, and a respirator mask are a must.

9. Clamps and Level
Clamps serve the crucial role of securing the wooden slabs firmly as the epoxy undergoes the curing process. This not only ensures stability but also significantly reduces the formation of minuscule bubbles during the epoxy pour. Additionally, employing a level is key to guaranteeing that your table maintains an impeccably flat surface.

10. Heat Gun or Torch
A heat gun or torch is used to remove air bubbles from the epoxy after it's poured, ensuring a smooth, clear finish.
- Should read: How To Make Epoxy Tables

Embarking on the journey of crafting an epoxy table is a fulfilling endeavor that beautifully blends artistic creativity and skilled craftsmanship. Equipped with this comprehensive guide detailing the tools needed to make epoxy table, and a dash of patience, you're well on your way to producing your very own exquisite epoxy table. We eagerly anticipate seeing your unique creations. Don't hesitate to tag us in your posts across social media platforms to share your remarkable ideas with our community. Here's to happy crafting!
