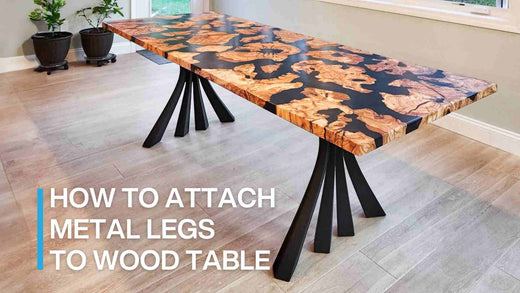
If you've ever wondered how to attach metal legs to wooden table, welcome to a creative and fun DIY paradise. This step by step guide is definitely useful for you. Even if you're new, it's okay. These steps are very easy to follow!
How To Attach Metal Legs To Wood Table?
Learning how to attach metal legs to a wooden table top is a valuable skill for those who love DIY furniture. With the right guidance and tools, you can transform a simple tabletop into a customized piece of furniture that reflects your style and creativity.
Tools and Materials
- Metal legs with mounting plates and adjustable levelers (optional)
- Screws (appropriate length and type)
- Drill and drill bits
- Screwdriver
- Measuring tape
- Pencil
Step 1: Measure and Mark

Measure and mark the points where you want to attach the metal legs
Credit: @Los Muertos Crew on Canva
First, you turn the table upside down. Use measuring tape and a pencil to measure and mark the positions where you want to attach the metal legs. Normally, you should place your feet 2 inches away from the edge of the table. Remember to keep the distance balanced, even, and symmetrical!
Step 2: Drill Holes

Remove legs and drill holes for threaded inserts
Credit: @Andrey Sayfutdinov on Canva
Start by drilling a pilot hole first to see if the screw needs to be adjusted properly and to prevent the risk of splitting the wood deeper (if any). Please choose a drill bit slightly smaller than the screws, about 1-2mm. Drill to a depth slightly shorter than the length of the screws to avoid piercing the tabletop.
Step 3: Install Threaded Inserts

Install the T-nuts into the holes
Credit: Flowyline Design
You would want to do the threaded insert by hand with a T-wrench. Put a dab of wood glue or CA glue on the insert to help it slide in, and give a little more staying power. Do several back-and-forth twists while inserting. Remember to go slow.
Step 4: Attaching the Legs to the Wood Tabletop

Attach metal legs to the wood tabletop
Credit: Flowyline Design
Screw the legs into the tabletop. Tighten the bolts just tight enough. You can use nylon washers or paste wax to create enough space for movement. Well, here's a tip for you, tables with a thickness greater than 18mm will be compatible with 4.5mm wood screws.
Step 5: Check for Stability
Once you have finished attaching the legs to the tabletop, try pressing down on each corner of the table to see if it wobbles or tilts. If the table is unstable, adjust the levelers underneath the table or check the screws for looseness. It is best to follow our instructions for the great results.
How to Attach Table Legs to Butcher Block?
Butcher block has a larger tabletop than a regular wooden tabletop. There are a few differences between them, as follows:
- Wood type and thickness: Regular wood table tops are softer, thinner, and easier to drill; hardware requirements are not too strict. Butcher block is made from dense hardwoods like maple, oak, or walnut. They are much thicker, often 1.5 to 2 inches or more, so more specialized tools are needed.
- Screw type and length: Standard wood screws 1–1.5 inches long are sufficient. Meanwhile, butcher block requires about 2 inches of #10 size screws to penetrate the thick layer of wood. It also needs precise pre-drilling to avoid splitting the wood layer and to ensure a secure fit.
- Weight and stability: Regular wood tabletops are generally lighter, so standard leg positions and screws are enough. You are also easier to control and move when needed. But the butcher is too heavy to do that! You may need support to make adjustments easier.
- Adjustable levelers: Butcher block really needs adjustable levelers because it is heavy, difficult to adjust, and the pressure on the floor is also higher. Therefore, you need to cushion them to protect the floor from scratches.
FAQs
What Are Common Table Leg Attachment Methods?
Mounting plates: This method is simple without aprons to install with just basic tools. It is flexible for many leg styles with different designs, creating a strong and stable connection to the tabletop. However, with glass table tops, the mounting plates will easily be exposed, causing a loss of aesthetics.
Threaded inserts: Metal inserts are placed into pre-drilled holes in the tabletop. Table legs with threaded bolts are then screwed into these inserts. Its advantage is that it is easy to remove and install when needed. It hides well inside the tabletop without being obvious, like mounting plates. But you need to drill and insert accurately with specialized tools to ensure aesthetics.
Direct screwing: It really is as simple as it sounds! Metal legs are directly screwed into the tabletop without any extra hardware. This method is the most cost-effective but less safe to use. There is a risk of wood splitting.
Cleats or stretchers: Wooden or metal cleats (or stretchers) are attached to the underside of the tabletop. The legs are then attached to these cleats. It sounds easy, but it requires a lot of materials and is confusing in experience and look. It is also less popular than the above types.
Not all methods are suitable for your DIY project. Choosing the right one is extremely important for some reasons:
- Safety: If not installed properly, your table will be at risk of collapsing and causing unnecessary injuries.
- Aesthetics and function: The right method will preserve the beauty of the table over time, ensuring it serves your needs well without causing discomfort.
- Longevity: Installing it correctly from the beginning will save you time and effort in adjusting or repairing. It also maintains the structural integrity compared to deviations due to selecting the wrong meth
Reasons Why You Should Not Screw Legs Into Some Tabletops
To get the answer to the question "How to attach metal legs to a wooden table top effectively?", you should keep in mind the following.
Live edge wood is very sensitive to changes in humidity. With natural wood, if exposed to extreme temperature changes, they can potentially warp and/or split. Thus, all the woodworkers need to be very careful to install hardware to the wood tabletop such as screws.
For that reason, we only can recommend to all customers to use "thread nut and bolt", it would be a safer way to hold the table. In case of timber table top, lumber table top, oval table top, it will be no problem to use screws for fitting
How Tall Should My Table Be and Where Do I Mount My Table Legs?
A dining table should be 30 inch tall, so ensure that you order the correct height based on your particular tabletop. Besides, there is a big difference between a 1.5 inch tabletop and a 3 inch tabletop when attached to the same type of table leg. Many steel bases come with adjustable feet to give you a 1/2” or so of wiggle room.
Most people want the option to seat someone at the ends of the table as well as the sides. So I recommend a minimum of 16” from the end of the table to the front of the table leg to allow for a chair to be pulled up. If your table is over 96” you can push that back to 18-20”.
If you're planning to attach your available wood table with metal legs, Flowyline is here to help. We offer more than 100 unique and quality table legs and table bases. All are 100% handcrafted and feature designs inspired by nature. And this will delight you! All are equipped with pre-drilled hole mounting plates and adjustable levelers. Custom foot height and mounting plate size are possible. So, don't hesitate to ask!

All products support customizing mounting plate sizes
Credit: Flowyline Design
Buy now: Metal Bench Legs 116 Nura
Should read:
- How Do You Attach Metal To Granite?
- How To Attach Glass Table Top To Metal Table Legs?
- How To Add Metal Legs To Furniture: 4 Professional Tips For Homeowners
-
How to Attach Metal Legs to Marble Top?
In conclusion, learning how to attach metal legs to wood table is a valuable skill for anyone keen on DIY furniture. By following our detailed guide in this article, you can complete your favorite table easily and quickly. Whenever you need unique and quality metal table legs, check out our collections and contact us via email at customerservice@flowyline.com or our official social media channels.