
Last month, a customer in Denver sent us photos of the picnic table they built following how to build a picnic table online tutorial. The benches sat at 15 inches high. Way too low. Their kids’ knees hit the table, and the adults had trouble standing up. They ended up rebuilding the whole thing.
In fact, most online tutorials get bench height wrong. The correct seat height is 17 inches, not 15. That two-inch difference is what separates a comfortable picnic table from one nobody wants to sit at.
I’m Alex from Flowyline Design. Since 2018, our team has worked with over 20,000 woodworkers building tables with metal table legs. Today, we’re walking you through how to make a picnic table (6-foot) using a method that actually works. With the corrections that matter!
Tools & Materials: Everything You Need to Build a Picnic Table
Our picnic table plans are designed for everyday builders. The tool list is short, and everything you need is available at any hardware store.
Before you start shopping, it’s recommended to run through both lists below and check what you already own. We think you already have at least half of these tools sitting in the garage.
1. Tools Required
Essential tools:
- Miter saw, or circular saw
- Drill/driver
1/2" drill bit (for carriage bolts) - Tape measure
- Speed square
- Pencil
- Level
- Clamps (at least 4)
- Wrench or socket set
- Safety glasses
- Work gloves
Nice to have:
- Random orbital sander (saves 2+ hours)
- Sawhorses
- Framing square
Total tool cost if buying: $180 — 280 (you’ll use these for future projects)
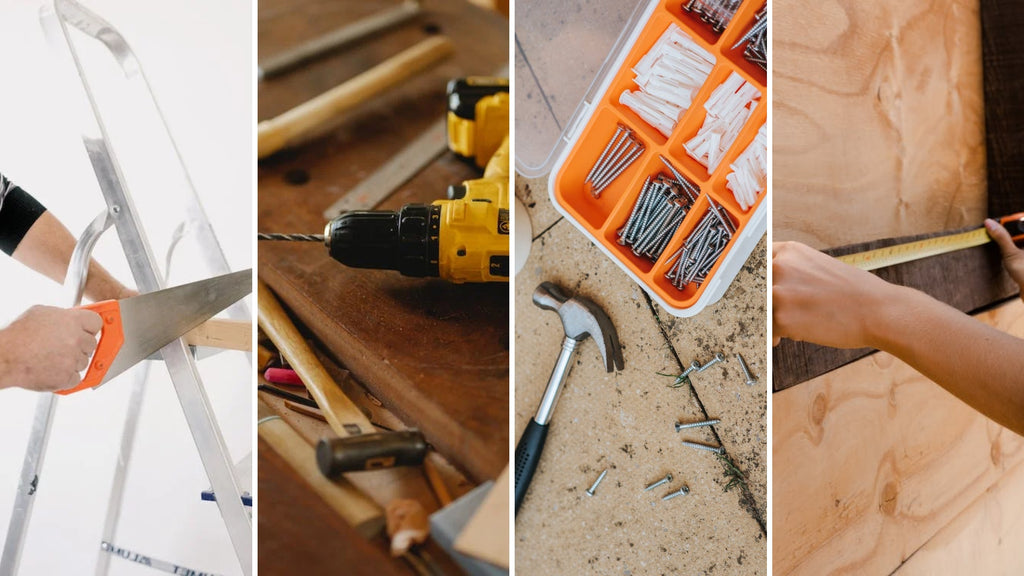
Tools required to construct a picnic table
Photo: Canva
2. Materials List
Lumber (Pressure-Treated):
- (5) 2x6 x 8' boards (tabletop and benches)
- (5) 2x4 x 8’ boards (legs and supports)
Hardware:
- (2.5 lbs) 2½" exterior screws
- (12) 3½" x ⅜" carriage bolts with washers and nuts
- (1 bottle) Exterior wood glue
Finishing:
- Sandpaper: 80-grit, 120-grit, 220-grit
- Exterior wood stain (optional)
- Exterior sealer or paint
Total material cost: $180 — 250, depending on lumber prices in your area
Complete Cut List: Measure Twice, Cut Once
You should cut everything at once, then label each piece with painter’s tape.
From 2x6 Boards
| Piece | Quantity | Length | Purpose |
| Table slats | 4 | 72" (6 feet) | Tabletop surface |
| Bench slats | 4 | 72" (6 feet) | Bench seats |
From 2x4 Boards
| Piece | Quantity | Length | Angle Cuts | Purpose |
| Table legs | 4 | 36" | 30° both ends (parallel) | Main support legs |
| Tabletop supports | 3 | 28½" | Square cuts | Cross braces under table |
| Upper leg braces | 2 | 61" | 45° bevel on top edges | Connect legs at top |
| Bench supports | 2 | 61" | Square cuts | Hold the benches to the legs |
| Bench cleats | 6 | 11" | Square cuts | Attach benches |
| Angled braces | 2 | 23½" | 45° both ends (parallel) | Table-to-bench stabilizers |
How to Build a Picnic Table: A Step-by-Step Guide for Beginners
Building a picnic table looks quite challenging from the outside. But don't worry. Once you break it into stages, it's easy to follow. Each step builds on the last, so don't skip ahead. Set aside a whole day and clear some workspace.
Besides, first-time builders who rush are the ones who end up with wobbly tables and miscut legs. We've seen it enough times to know.
Step 1: Cut All Your Lumber (60 — 90 minutes)
Before you touch the saw, your first job happens at the lumber yard. The wood you bring home sets the ceiling for everything that follows. Even perfect cuts and solid assembly can't save a warped or wet board.
So, the first action is to:
Selecting Pressure-Treated Lumber
When you're at a lumber local store, you'll see pressure-treated 2x4s and 2x6s stacked in bundles. You shouldn't grab from the top. Instead, pull boards from the middle of different bundles to find the straightest ones.

Pull boards from the middle of different bundles to find the best ones
Photo: Freepik
Making the Cuts
-
Table and bench slats: Cut all (8) 2x6 boards to 72" length
- This is super simple, you only need straight cuts
- These become your tabletop and bench surfaces
-
Table legs: Cut (4) 2x4s to 36" with 30° angle cuts on BOTH ends
- Set the miter saw to 30°
- Cuts should be parallel (angles go in the same direction)
- Creates the classic A-frame leg stance
-
Tabletop supports: Cut (3) 2x4s to 28½"
- Straight cuts
- These go under the table
-
Upper leg braces: Cut (2) 2x4s to 61"
- Initially straight cuts
- You'll add a 45° bevel to the top edge later (Step 2)
-
Bench supports: Cut (2) 2x4s to 61"
- Straight cuts
- These hold the benches to the legs
-
Bench cleats: Cut (6) 2x4s to 11"
- Simple straight cuts
- Small pieces that attach to benches
-
Angled braces: Cut (2) 2x4s to 23½" with 45° angle cuts on BOTH ends
- Cuts should be parallel (create a parallelogram shape)
- These stabilize the table-to-bench connection
Cutting the 30° leg angles:
Most people will get confused in this step. So, here's the simple version:
- Set your miter saw to 30°
- Cut one end of the board
- Measure 36" from the point of that cut
- Keep the saw at 30° in the SAME direction
- Make the second cut
Result: A 36" board with matching 30° angles that look like this: / / (both angles point the same way)
But why 30° and not the 22.5° everyone talks about?
The 30° angle creates a more stable, wider stance for the A-frame legs. The 22.5° angle you see everywhere is for tables with attached benches where the legs connect differently. We use 30° because it's more stable and easier to cut consistently.
Step 2: Build the Tabletop (45 — 60 minutes)
Next, with all your lumber cut and labeled, the tabletop is where things start coming together. This step is less about precision and more about keeping everything flat, square, and properly spaced before you lock anything in.
Layout the Tabletop
- Find a flat work surface (garage floor, driveway, deck)
- It needs to be actually flat, though. Any bow or slope in your work surface transfers directly to the table.
- Lay out four 72" 2x6 boards face down
- Face down because you're attaching supports to the underside
- Keep them parallel
- Create even spacing between boards
- Use a piece of scrap wood as a spacer (about ¼" to ⅜")
- This gap lets water drain and wood expand
- Without gaps, water sits on the surface and accelerates rot
Attach the Cross Supports
Layout:
- First support: 7" from one end
- Second support: 7" from the other end
- Third support: Center (approximately 32½" from either end)
Attachment process:
- Position the first 28½" cross support 7" from the end
- Make sure it's perpendicular to the slats (use a speed square)
- Clamp in place
- Pre-drill holes to prevent splitting
- Drive four 2½" screws through each slat into the support
- Repeat for the other two supports
Pre-drilling is a must: Pressure-treated lumber splits like crazy, especially near the ends. Thus, always pre-drill before driving screws. And if you're within two inches of a board end, definitely pre-drill. That's where it splits the worst.
Add the Upper Support Brace (The 45° Bevel Cut)
This is the clever part that gives the table extra rigidity.
Why this brace matters:
This 61-inch brace connects the two legs at the top. It helps stop the table from racking, that side-to-side wobble you get with poorly built tables. The 45° bevel lets it sit flush against both the tabletop and the legs. Without the bevel, you'd have gaps.

How to build a wooden picnic table Step 2
Photo: Youtube | Home Depot
How to cut the bevel:
- Take one of your 61" upper leg braces
- Measure the thickness of your 2x4 cross support (should be 1½")
- Mark a line 1½" from the top edge along the entire length
- Set your miter saw to 45°
- Cut along this line, creating a 45° beveled edge.
Installation:
- The beveled edge faces UP (against the tabletop)
- Apply exterior wood glue along the beveled edge
- Position the brace perpendicular to the table slats
- Drive one 2½" screw into each table slat (4 screws total)
- Repeat for the second upper leg brace on the other side.
Visual check:
When done, flip the table over. You should see:
- Three cross supports running width-wise
- Two upper leg braces with beveled tops, positioned 7" from each end
Step 3: Attach the Legs (60 — 90 minutes)
Next, we're going to make it look like a table.
Position the Legs
Important: Keep the table face down (supports facing up).
- Stand a table leg (36" with 30° cuts) at one corner
- The 30° angle at the top should sit flat against the upper leg brace
- The 30° angle at the bottom should sit flat on the ground
- Position the leg so it's flush with the edge of the table
- Use a level to check that it's plumb (straight up/down when viewed from the end)
Temporary Attachment
Before you drill the permanent carriage bolt holes, secure the leg with 2 — 3 screws:
- Drive screws at an angle through the leg into the upper brace
- This holds everything in place while you drill
- You'll remove these later (they're just temporary)
Install Carriage Bolts
Why carriage bolts instead of just screws?
In reality, screws loosen over time. People sitting, standing, kids jumping on the table. All that movement works them loose eventually. Carriage bolts with nuts create a mechanical lock that stays tight for years. That's why our team uses them instead of screws here.
Drilling and installing:
- Drill two holes through both the leg AND the upper leg brace
- Use a ½" drill bit
- Holes should be about 8-10" apart vertically
- Stay at least 2" from board edges
-
Insert 3½" x ⅜" carriage bolts from the outside
- The square shoulder under the bolt head locks into the wood
- You might need to push pretty hard. Sometimes, you have to tap it with a hammer to get it seated.
- Add a washer and a nut on the inside
- Hand-tighten first
- Then use a wrench to tighten fully
- Remove temporary screws (the ones you added for positioning)
- Repeat for all four legs.

How to make a picnic table DIY
Photo: YouTube | Home Depot
Pro tip: Don't fully tighten all bolts until all four legs are installed and you've checked that the table sits flat. Once everything is square and level, do a final tightening pass.
Step 4: Install Bench Supports
- Measure 10 inches down from the bottom of the table leg
- Mark on all four legs
- Use a square to draw a level line across
-
Position the 61" bench support
- The TOP edge should align with your 10" mark
- Center it on the table (should be equal overhang on both sides)
- Clamp in place
-
Attach with screws
- Drive four 2½" screws through the bench support into each leg
- Pre-drill to prevent splitting
-
Install carriage bolts for permanent strength
- Drill two ½" holes through the leg and bench support
- Space holes 8 — 10" apart
- Insert 3½" x ⅜" carriage bolts
- Add washers and nuts on the inside, tighten with a wrench
- Repeat on the other side
Double-check before you drill: Measure from the ground up to the top of your bench support. You're looking for about 15.5 inches here. Once the bench boards sit on top, that gets you to the 17-inch final seat height we talked about earlier.
Step 5: Build the Benches (45 minutes)
The benches are what make or break the whole table. Too low and your knees jam into the table. Too wobbly, and the kids tip them within a week. Both problems are completely avoidable if you get the sizing and attachment right from the start.
Here's how to build benches that are sturdy, properly sized, and attached to last.
Prepare the Bench Slats
Each bench uses two 72" 2x6 boards laid edge-to-edge.
Layout:
- Lay two bench slats face-up on a flat surface
- Use spacers to create a ¼" gap between them (water drainage)
Mark the Cleat Positions
You're attaching three 11" cleats under each bench.
Measurements:
- Find center: Measure to 36" and mark a line across both boards
- Mark end cleat positions: 7¾" from each end, mark a line across both boards
You should have three marked lines across your two bench slats.
Attach the Cleats
- Position the cleat on the line (centered on the gap between boards)
- Pre-drill screw holes
- Drive two 2½" screws through each bench slat into the cleat
- Repeat for all three cleats on both benches
Result: Each bench is now a stable unit with three cleats underneath.
Mount the Benches to the Table
Important: The bench slats should overhang the bench support by 1" on the end closest to the table legs.
Why this overhang matters:
It provides foot clearance so people can comfortably slide their feet under the table when sitting down.
Mounting process:
- Position the bench against the bottom of the bench support
- The cleats should sit on top of the bench support
- 1" overhang at the leg end
- Clamp in place
-
Drive screws from underneath
- Four 3½" screws through the bench support up into each cleat
- These long screws create a strong connection
- Repeat for both benches on both sides

Plans on how to build a picnic table
Photo: YouTube | Home Depot
Final check: Sit on the bench. Does it feel solid? Can you rock it? If there's wobble or movement, you should add more screws through the bench support into the cleats.
Step 6: Add Angled Braces (20 minutes)
These diagonal braces keep the table from racking. That's the twisting motion you feel when people sit down or stand up.
But what do these braces do?
- Without braces: The table can shift side-to-side, especially when kids climb on and off.
- With braces: Rock-solid stability.
Measure and Cut
The brace runs from the center tabletop support down to the center bench support.
Measurement: Should be about 23½" with parallel 45° cuts on each end.
Why "about"?
We say "about" because every table assembles slightly differently. Depending on how tight your joints came together, you might need to adjust that length by ½". Measure your actual table before cutting.
To measure:
- Hold a scrap 2x4 from the center of the tabletop support to the center of the bench support
- Mark where it intersects each
- Measure the distance
- Cut your brace to this length with 45° parallel angles
Install the Braces
- Position the brace from tabletop center support to bench support center
- Pre-drill screw holes at both ends
-
Drive 2½" screws
- Two screws at the top into the tabletop support
- Two screws at the bottom into the bench support
- Repeat on the other side
Pro tip: The 45° angle cuts should make the brace sit flush against both supports. If there's a gap, re-cut the angle.
Step 7: Sand and Finish (2 — 4 hours depending on Finish)
Why do you need to sand pressure-treated wood?
Pressure-treated lumber comes rough from the mill. It has:
- Splinters everywhere
- Rough texture
- Potential chemical residue on the surface
So, if you skip sanding, someone WILL get a splinter. Probably a kid. Probably you.
Sanding Process
Focus areas (in priority order):
- All edges: That's where hands grip, and legs rub constantly
- Bench tops: Where people sit
- Tabletop surface: Where food goes
- Everything else: For general smoothness.
Grit progression:
- 80-grit: Remove roughness, round over sharp edges (30 mins)
- 120-grit: Smooth everything (45 mins)
- 220-grit (optional): For silky-smooth tabletop and benches (30 mins)
Hand sanding vs. power sanding:
- Hand: 3 — 4 hours, good arm workout, thorough
- Random orbital sander: 45 — 60 minutes, $60 tool, and it's easier than hand sanding.

Picnic table build in step 7
Photo: YouTube | Home Depot
Finishing Picnic Table with Exterior Stain + Sealer (Most Popular)
Process:
- Let the sanded wood dry completely (24 hours if damp)
- Apply exterior wood stain with a brush or rag
- Wipe excess after 5 — 10 minutes
- Let dry 24 hours
- Apply 2 coats of clear exterior sealer
- Let cure 48 — 72 hours before use
Cost: $35 — 60 total
Re-application: Every 2 — 3 years
How Much Does It Cost to Build a Picnic Table
It won’t be expensive to build a picnic table. However, the materials you choose upfront directly affect how long it lasts. Below, we’ve broken costs into three tiers. Pick the one that matches your budget and how long you want the table to last.
 Estimate the cost to make a picnic table
Photo: Flowyline
6 Important Mistakes to Avoid When Building a Picnic Table
Most picnic table builds don't fail during construction. They fail in the months after, because of decisions made before the first screw went in. The same mistakes show up every single time. None of them is complicated. All of them are avoidable.
Here's what to watch out for before you learn how to build a picnic table:
1. Not Letting Pressure-Treated Lumber Dry
Fresh pressure-treated lumber from the store is SOAKING WET. A lot of people don't realize this. If you build immediately and apply the finish, it won't penetrate properly and will start peeling within months.
The fix:
- Stack your lumber with spacers between each board so air can circulate.
- Let it dry for 2 to 4 weeks minimum in warm, dry weather — up to 3 to 6 months in humid climates.
- Check moisture: When the wood feels dry to the touch and the green color fades, that's your sign.
2. Not Pre-Drilling Screw Holes
Pressure-treated wood splits easily, especially near board ends. Drive a screw within two inches of the end without pre-drilling, and you might split the board right there.
The fix:
- Always pre-drill holes for screws
- Use a drill bit slightly smaller than the screw diameter
- Takes an extra 10 minutes and saves you from split boards
3. Using Indoor Screws or Nails
Indoor screws rust within months when they're outside. And nails work loose over time from the wood movement with the weather.
The fix:
- Use exterior-rated screws (coated or stainless steel)
- Or hot-dipped galvanized screws
- Don't use indoor drywall screws. They're terrible outdoors and will give you problems fast.
4. Tight Board Spacing (No Drainage Gaps)
Butting boards tight together traps water, which leads to rot.
The fix:
- Always leave ¼" to ⅜" gaps between boards
- Water drains through instead of pooling
- Wood can expand in humidity without binding
5. Building on Unlevel Ground
Build on a flat surface. If you don't, you'll never know if the legs are even until you move the table to its final spot. Then it wobbles, and you're taking the whole thing apart to fix it.
The fix:
- Build on a flat surface (garage floor, level driveway)
- Then move to the final location
- If the ground isn't level, use adjustable feet or pavers to level it
6. Skipping the Sanding
We've seen customers skip it and regret it fast. Splinters happen. Then they have to sand anyway, except now the table is fully assembled and way harder to work on.
The fix:
- Budget time for sanding before you start building.
- Rent or buy a random orbital sander if you don't have one.
- Pay extra attention to the edges and anywhere people actually sit or touch.
FAQs
1. How Many 2x6 Do I Need for a Picnic Table?
For a standard 6-foot picnic table using this plan, you need 8 boards total. Four 2x6x8 boards for the tabletop and four 2x6x8 boards for the benches.
Buy one or two extra just in case. You might split a board during cutting or find a bad knot once you get home. Lumber is cheap. A second trip to the hardware store on a Saturday is not.
2. Is it Hard to Build Your Own Picnic Table?
No, this is one of the best beginner woodworking projects you can take on. You need a saw, a drill, and the ability to measure straight.
The trickiest part is cutting the 30° leg angles accurately, and even that becomes easy once you do a test cut on scrap wood first. Most first-time builders finish in a full day, including sanding and finishing.
How to build a wood picnic table
Photo: ©Tom Fowlks on Canva.com
3. What’s the Best Type of Wood to Use for Building a Picnic Table?
Pressure-treated pine is the most practical choice for most people. It’s affordable, widely available, and it handles weather well.
Cedar is worth considering if your budget allows. Naturally rot-resistant, looks great, and doesn’t need chemical treatment.
On the other hand, white oak is the premium option if you want a table that lasts 20 years or more with proper care.
Whatever you choose, avoid untreated pine or regular construction lumber because it’ll rot within a couple of seasons outside.
How to Build a Picnic Table: Build It Right, Use It for Years
After making a picnic table, we've noticed the same patterns. Here's what separates tables that last from ones that don't:
- Use straight lumber (spend 10 extra minutes at the store)
- Pre-drill screw holes (prevents splits)
- Correct bench height (10" down)
- Exterior hardware (screws and bolts that won’t rust)
- Apply finish (stain and seal, or at minimum just seal)
- Sand everything (especially edges)
Time investment: 8 hours
Cost investment: $180 — 250
Value: Outdoor gathering space for a decade+
That’s a pretty good return. And, if you have any questions about how to build a picnic table, please feel free to contact us anytime, and check our new blogs for more information. Thank you for reading!